
How-To
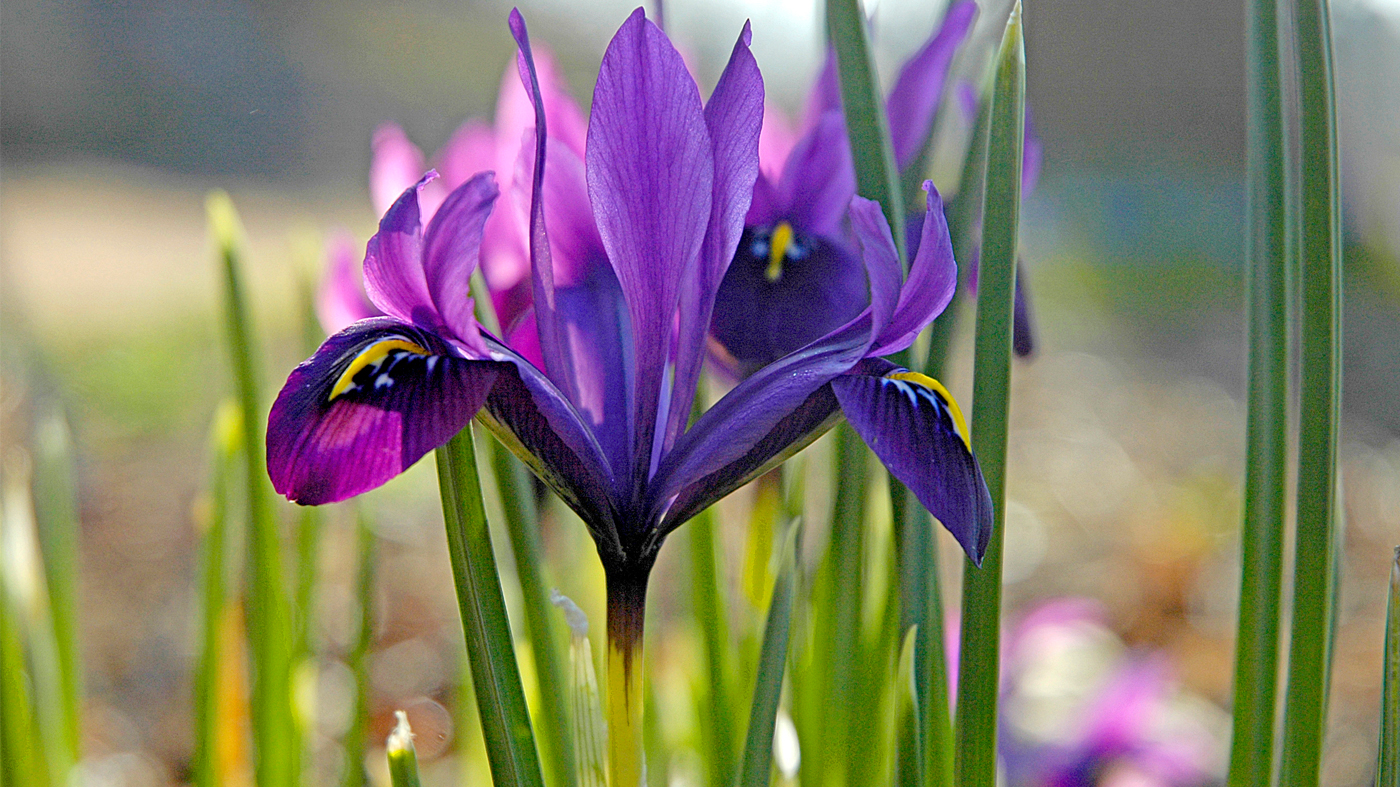
Garden Stories
Writing Like It’s 1776
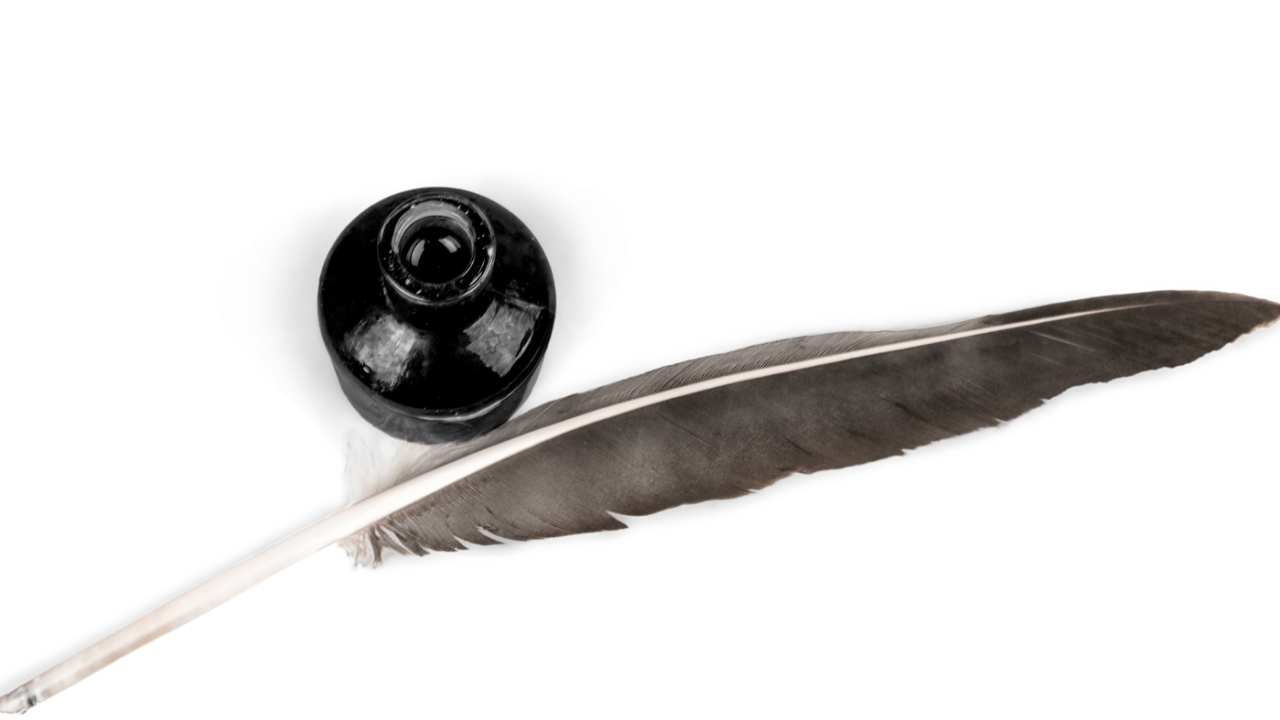
How to make a quill pen and your own ink
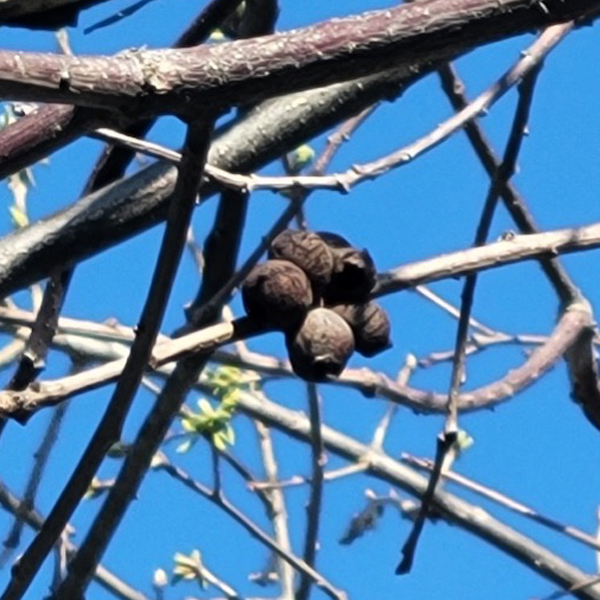
Oak galls form where a wasp has laid eggs on the branch.
In days of old, when men were bold, and ballpoints weren’t invented, Men made gall juice, and plucked a goose, and penned their words, contented.
— Katherine the Bard
Before computers, before typewriters and printers, people wrote important documents by hand in pen and ink—both of which they made themselves. How did they do it?
Here, I explain the process of making the ink used to write the Declaration of Independence and the Constitution of the United States of America. And I explain how to make a feather quill pen. So put on your powdered wig, ruffled shirt, and buckled shoes and let’s go!
The Ink
A long time ago, someone figured out that mixing a solution of crushed oak galls with rusty metal created a deep black liquid that made a nice dark permanent ink, which became the standard for writing important documents for centuries. The ink recipe is easy to replicate at home if you are up for kitchen chemistry. Be warned, though, this ink stains. That is kind of the point.
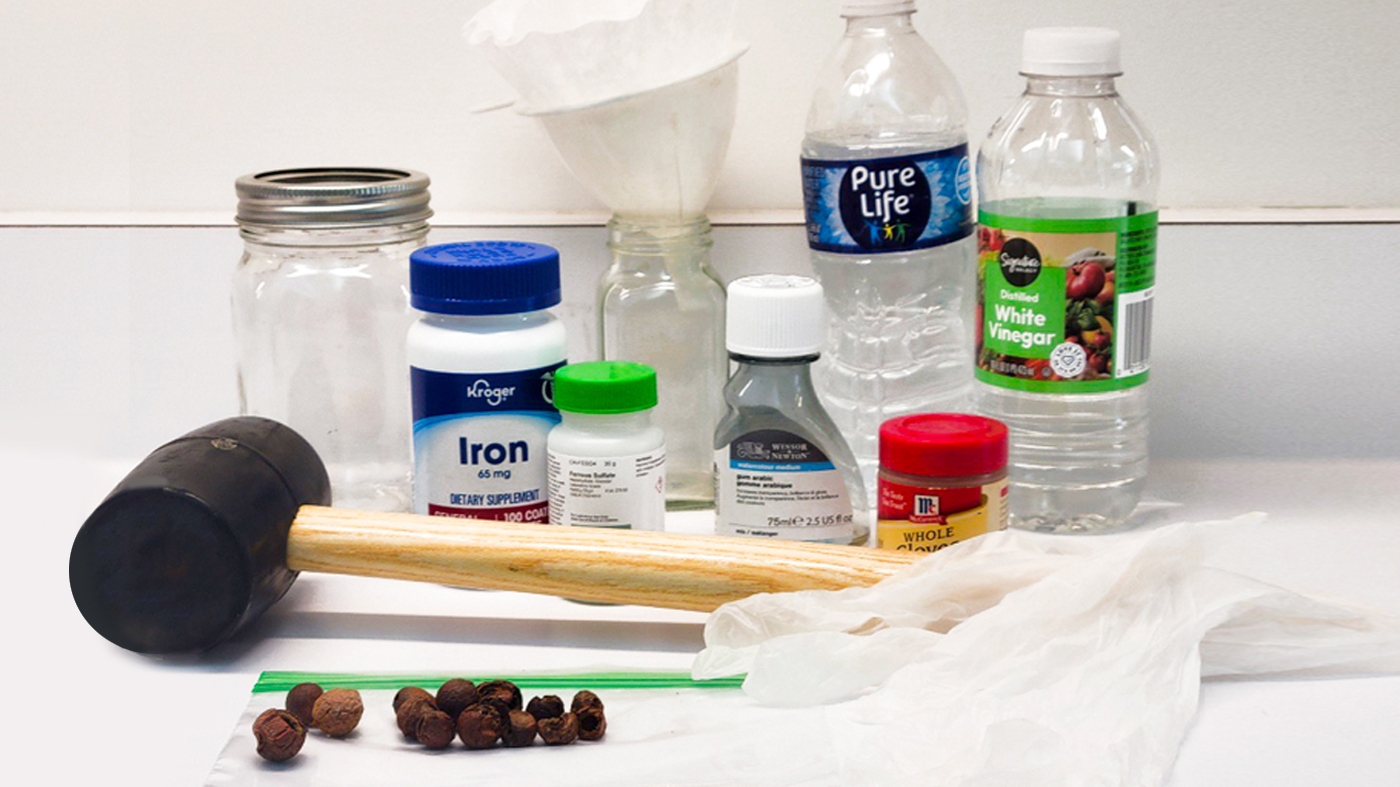
Ingredients
The ingredients are mostly plant-based, and each component has a backstory.
15 to 20 oak galls
An oak gall is the abandoned nest of an oak gall wasp. When an adult female wasp of the Cynipid family lays her eggs under the bark of an oak tree twig, the fun begins. The tree responds to the invasion by sending tannins, a toxic chemical defense, to the spot and encapsulates the insects in a ball of wood tissue. The wasp babies are immune to the tannins and happily grow inside the hard ball. After baby wasps complete their metamorphosis, the adult wasps dig their way out of the gall, leaving the blemish on the branch. These tannin-rich galls provide the main ingredient in our ink. Cynipid wasps are common. You can probably find and harvest galls from oak trees in your neighborhood. Otherwise, you can buy them online.
You will need oak galls, ferrous sulfate, gum arabic, whole cloves, distilled water, and vinegar.
½ teaspoon ferrous sulfate
This iron salt is available from laboratory supply companies. You can also buy iron supplement tablets and crush 15 of them into a powder to get about a half teaspoon. Before modern times, ink makers would have soaked an iron nail or other bit of rusty metal in vinegar to create “green vitriol” liquid. If you want to be totally authentic, you can try doing that.
1 teaspoon liquid gum arabic
Gum arabic comes from the dried sap of the acacia tree, which is native to Africa. It is tapped from the tree, dried. and crushed into a powder. In medieval times the dried sap of a cherry tree served the same purpose. Tree sap from either source thickens the ink and improves how it sticks to the paper while writing. Since gum arabic is an ingredient in both watercolor paints and baking, it is available at many art stores and places that carry cake decorating supplies. It comes in powdered or liquid form.
2 to 3 whole cloves or clove oil
Cloves have been used to preserve meat and other foods for centuries. They contain an anti-microbial chemical that also helps discourage mold growth in your ink. Bonus: it adds a warm, spicy fragrance to your ink!
½ cup distilled water
Several sources recommend that you use rainwater or distilled water, because these do not contain the chlorine or minerals found in tap water. I did not find this to be critical while making ink for fun, but again, if you are going for an authentic product, make the effort.
½ tablespoon vinegar
The acidic properties of vinegar make the ink less habitable to microbes, but may make your ink less archival, as the acid in the ink will affect the paper. If you are planning to write a historic document that survives 250 years, you probably don’t want to add anything that will destroy the paper or sheepskin parchment over time.
Hardware
Plastic or rubber gloves
Rubber mallet or hammer to crush the oak galls (or a mortar and pestle)
Plastic bags to contain the galls while you crush them
Glass or ceramic bowls for mixing because they are nonreactive and will not stain
A cone or strainer and coffee filters
Glass bottles with lids (clean spice jars or jelly jars; metal lids are OK)
Directions
1. Place about 15 oak galls in a plastic bag on a firm surface and gently hit with a mallet or hammer to break them apart into crumbs with some powdery bits. The smaller the better, but you don’t have to crush it completely into a powder.
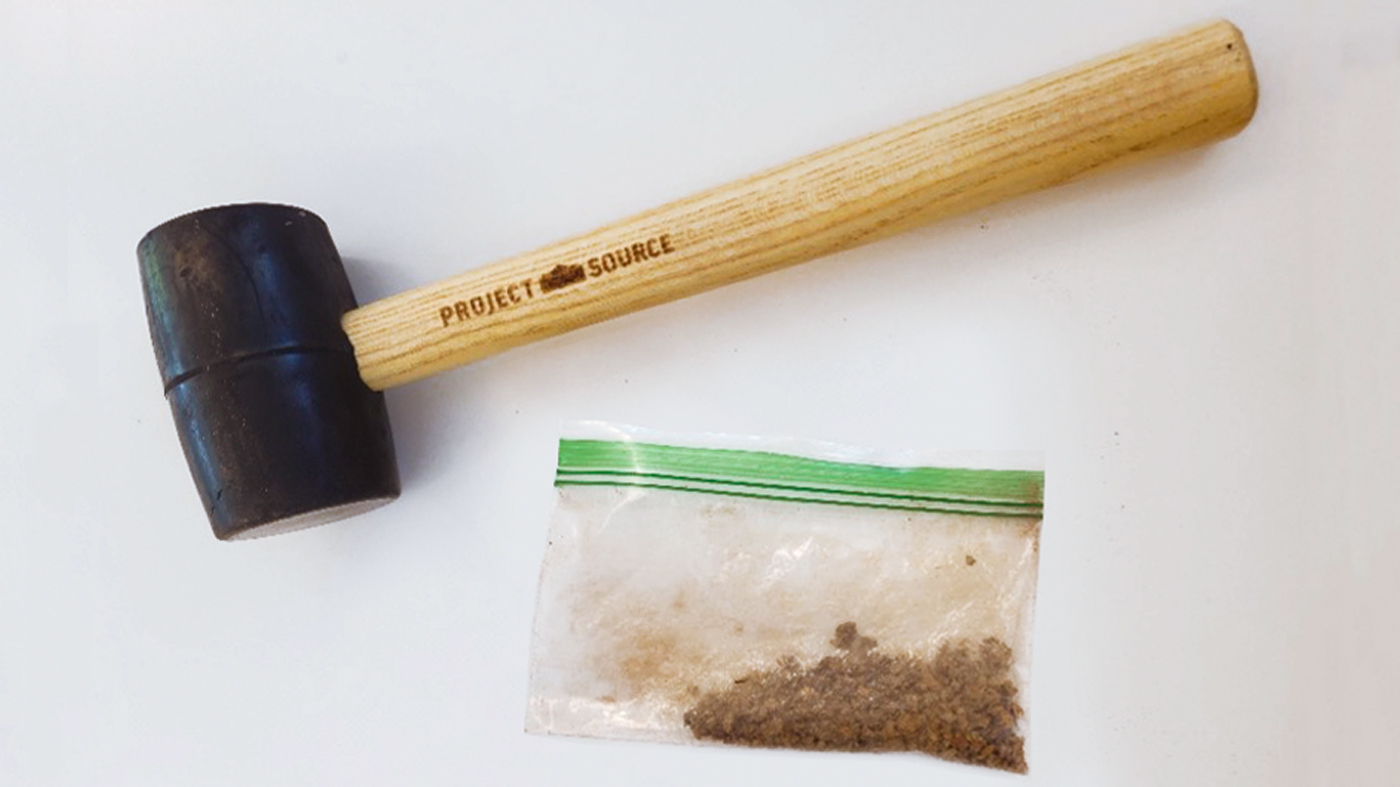
Crush the oak galls in a plastic bag with a mallet or hammer.
2. Put the crushed oak galls into a glass container and pour ½ cup of hot distilled water over the galls. Add 2 to 3 whole cloves or a drop of clove oil to prevent mold and gently mix it. Let the oak galls soak for at least a day, but preferably a week, stirring daily. It will become a rich brown color as the tannins dissolve in the water.
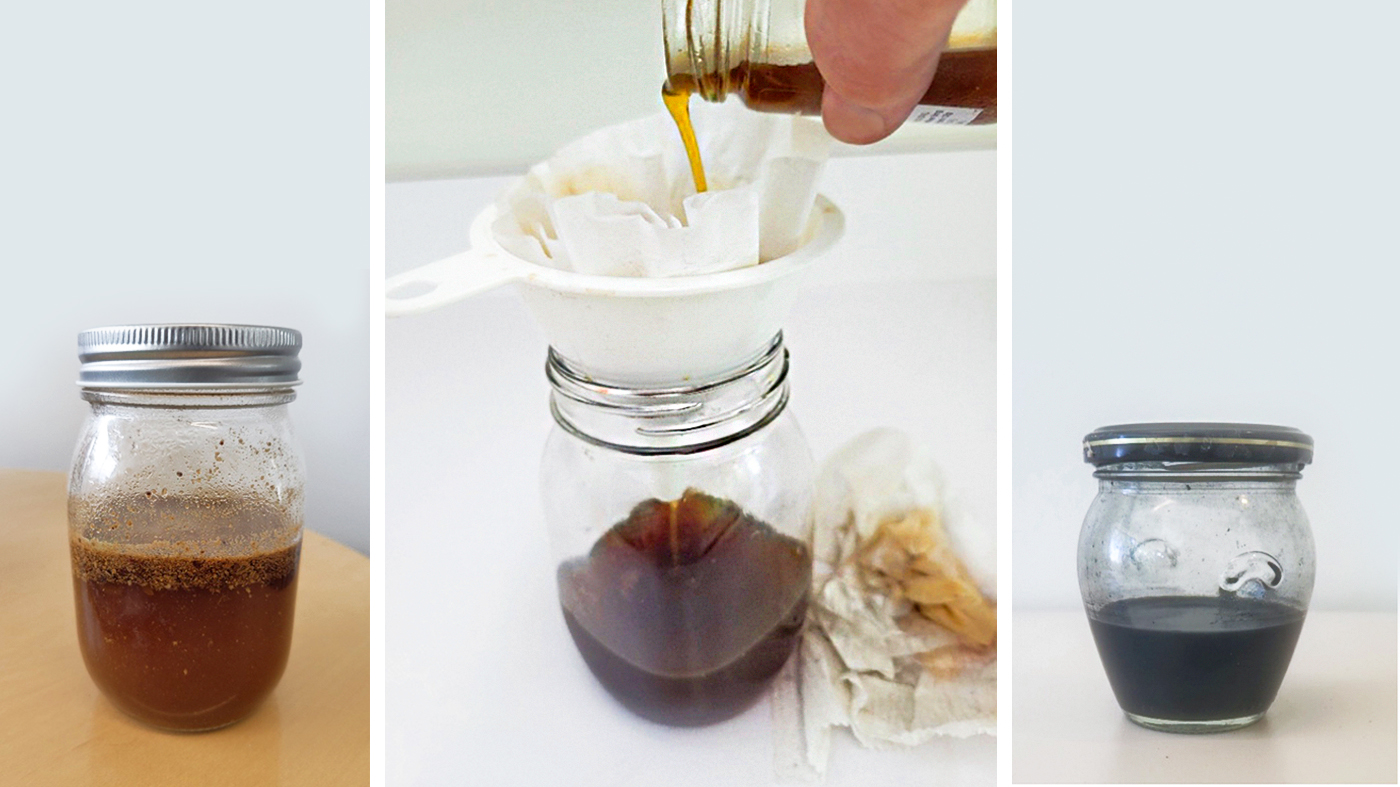
Tannins from the oak galls will dissolve in the warm water and turn the water brown, pour the tannin solution through a coffee filter to remove the particles, then after a week, your ink will be ready to declare its independence.
3. After steeping, pour the oak gall tannin solution through a strainer lined with a paper filter to remove solid particles. It is a good idea to pour it through a second filter to make sure you remove all the sediment.
4. Get ready for a mess. Wear gloves and protect your work surface. Add ½ teaspoon of iron sulfate to the tannin juice and mix. It will turn very dark immediately.
5. Add a teaspoon of gum arabic.
6. Optional: Add a teaspoon of vinegar. (My first batch of ink developed mold. I scooped out the floating mold colony and added vinegar with good results.)
7. Seal the jar with a lid so you don’t spill it. Allow the ink to rest another week or so; it will become darker over time.
The Feather Quill Pen
Metal pen tips, for dipping in ink and writing, have been around since ancient times but did not work well until after the Declaration of Independence was written. The pen of choice came from feathers, which are hollow and can be carved to suit the writer’s hand. To make your own feather pen, you will need:
Tools and Supplies
A large feather from a goose, pheasant, or other large bird. Clean feathers can be purchased from craft supply stores. Gathering feathers from most birds in the wild is illegal under the Migratory Bird Treaty Act. Exceptions are made for feathers from farm-raised birds like geese, ducks, and chickens, which are typically what you’ll find for sale in reputable stores.
A small knife with a sharp blade. An X-Acto® knife or thin utility knife works well. Once upon a time, gentlemen carried pen knives—small blades that still exist today, to refresh the points of their feather quills as they wore out.
A cup of sand in a heat-safe container
Directions
1. Find the balance
Hold the feather in your hand with the tips of your thumb, pointer, and middle fingers to see what feels best. It may feel more balanced if the shaft curves inward toward you. When you find a quill position you like, mark the top of the tip. That will be the pointed end of your pen.

2. Trim the bottom barbs
Remove the feathery barbs at the bottom of the shaft so that what you are holding is just the thick shaft and the feathery part is not touching your hand. This makes using the quill a little nicer.
3. Harden the quill
It can be helpful, but not necessary, to harden the quill. This process strengthens the keratin, making it easier to sharpen and hold a point. It would be an essential step for a scribe in 1776; less so if you are just having fun.
Back then, they would stick the feather shaft in sand that had been warmed by the fire. To replicate the process at home, you can heat a cup of sand in a heat-safe mug, glass cup, or other container at 350 degrees Fahrenheit for about 15 minutes until the sand is hot. Carefully transfer the sand to a ceramic mug and stick the pointed ends of the feathers in the sand until cool.
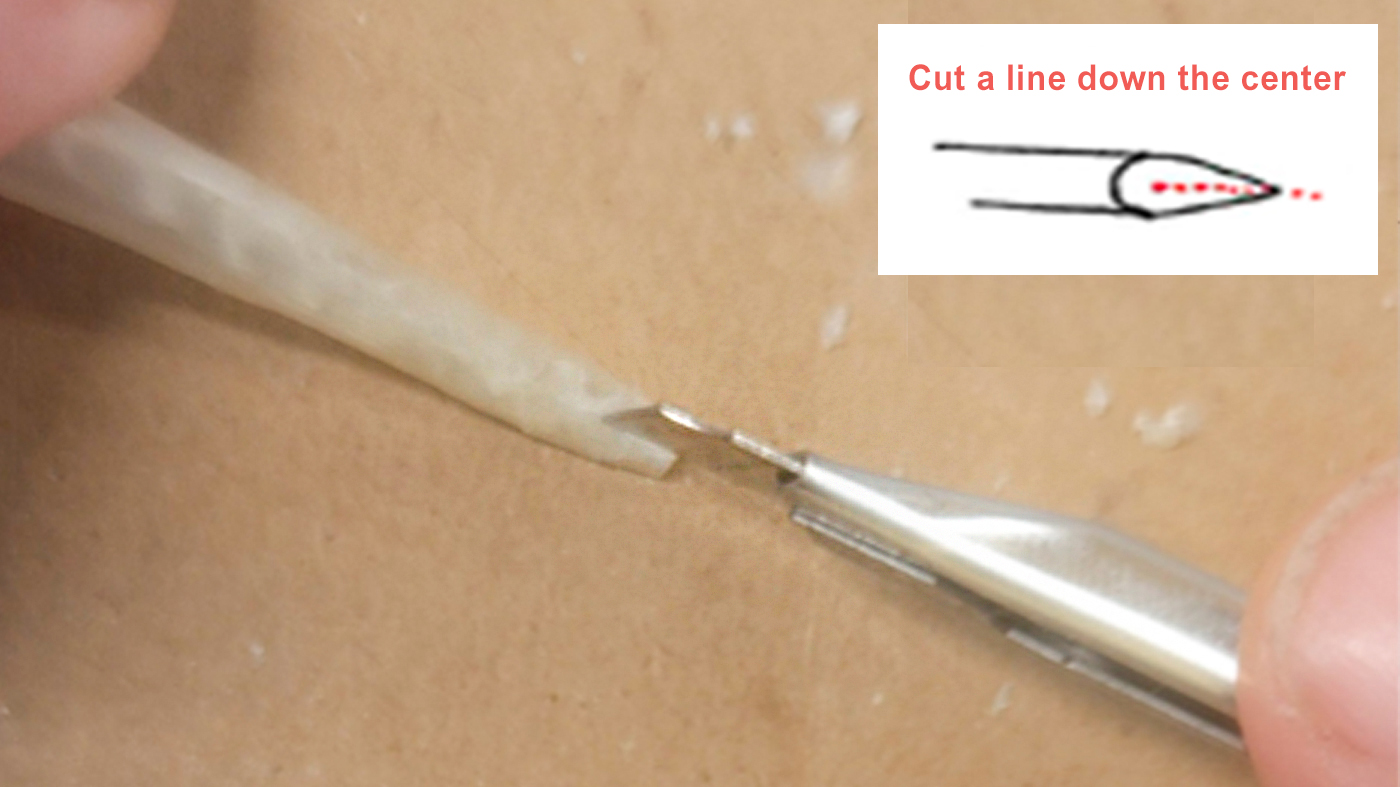
4. Cut the tip
When the feathers have cooled, you are ready to cut them. Using any kind of sharp small knife, cut the tip of the shaft off at about a 45-degree angle.
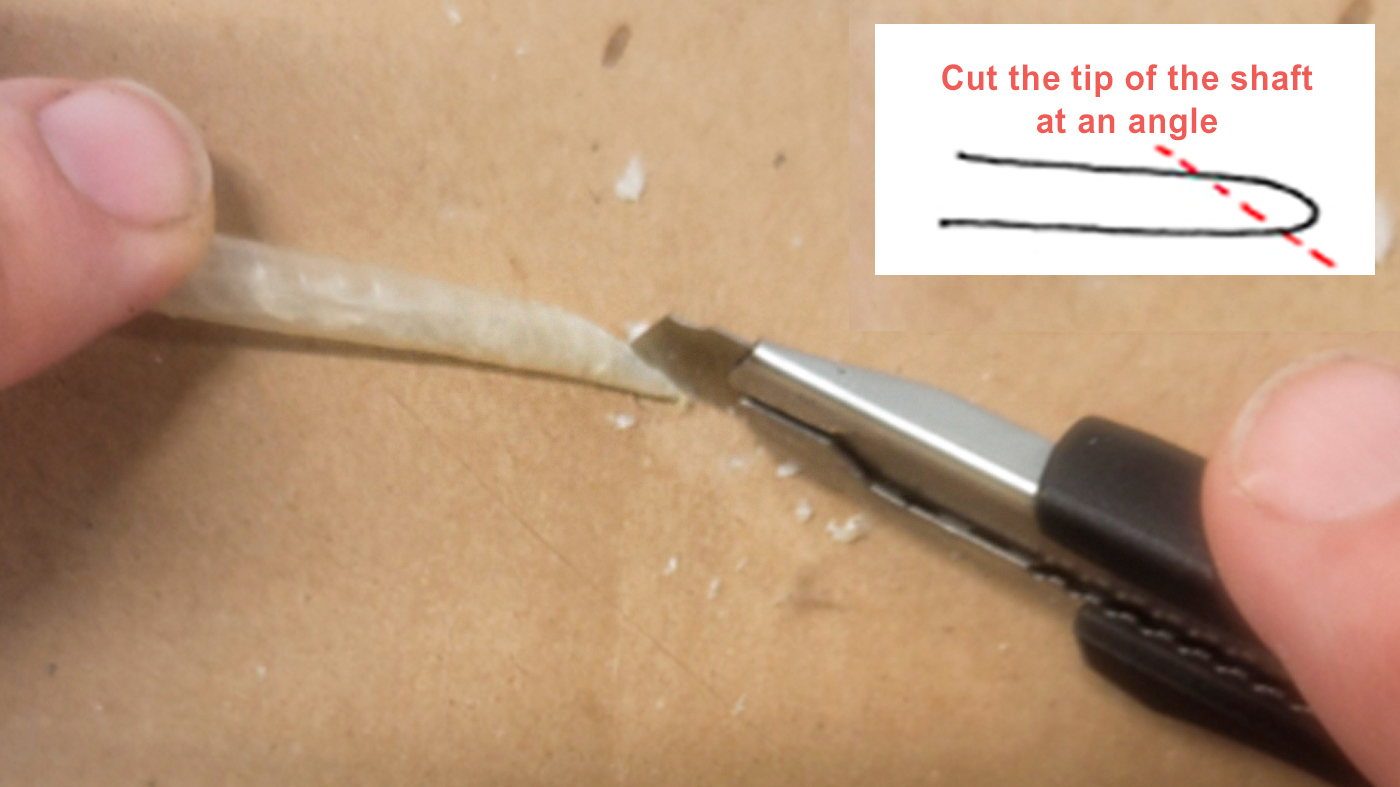
Put the feather against a cutting surface and cut a straight line down to the point of the pen. This slit will hold ink while you are writing.
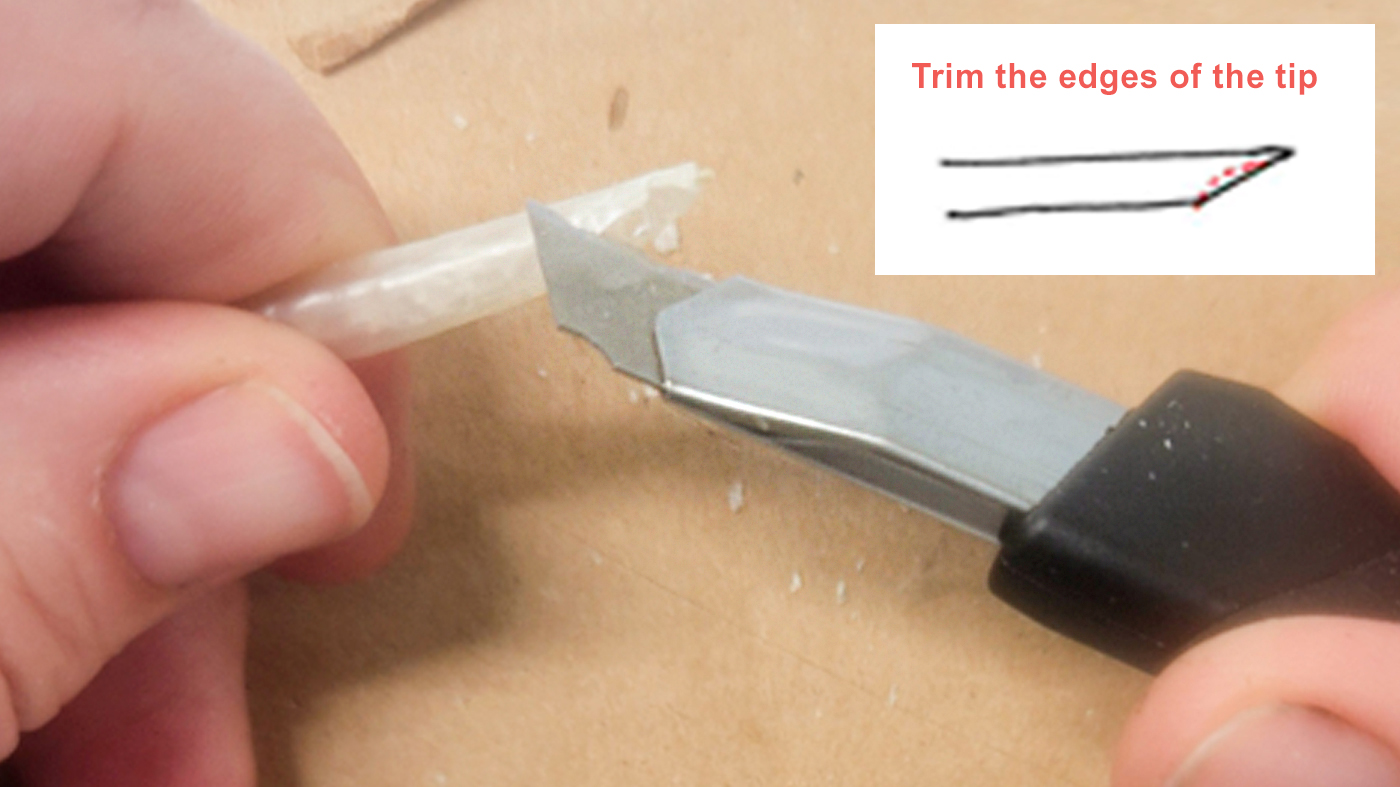
Carefully trim the sides of the angled cut. A curve is nice, but not necessary.
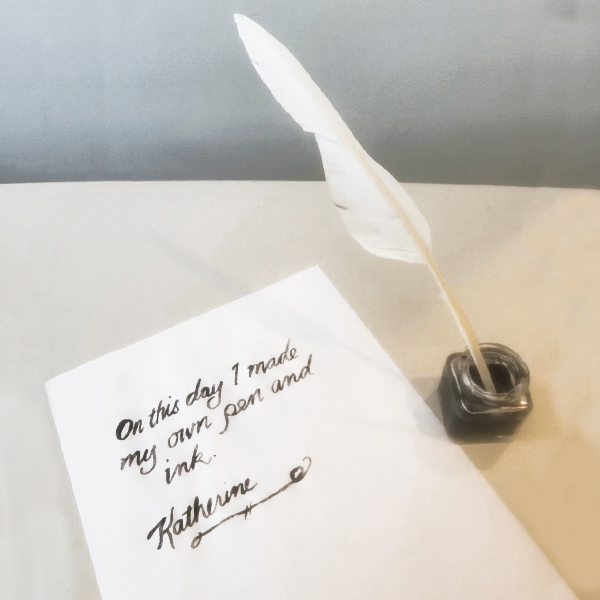
Now you are ready to write! Dip the tip of the pen into some ink and touch the tip to the edge of the ink jar to remove excess ink. Try writing your name. You will find that you need to write slower than you do with a modern pen. When the pen runs out of ink, dip it again and keep going.
You can vary the pressure to make your lines thinner or wider. Down strokes are more successful than upstrokes as you pull the pen and draw out the ink. Left to right works better than right to left for right-handers. Sorry, lefties: this may prove challenging for you because your strokes may feel like pushing rather than pulling, and your wrist will drag through the wet ink. Leonardo da Vinci solved this problem by writing right to left.
With practice and patience, you can master this skill and be prepared should you ever need to travel back in time.