
How-to
Garden Stories
Wearable Indian Corn
I always look forward to seeing Indian corn in the market and finding it in autumn decorations. Indian corn—in its range of hues from blue to deep maroon to oranges, golds, and yellows—extends the colors of the season long after the tree leaves have faded and been raked away. It is one of November’s icons, reminding us of the cultural and botanical history of the continent.
“You call it corn; we call it maize.”
Or so the 1970s TV ad for Mazola margarine told us.
Long ago, “corn” used to be the term for any grain seed, including barley, wheat, and rye, so naturally the new world plant “maize”—botanically known as Zea mays—was labeled as another kind of corn when it was introduced in Europe. For some reason, the name stuck, and we all think of the sweet yellow stuff on our dinner plates (and its close relatives) as the one and only “corn.”
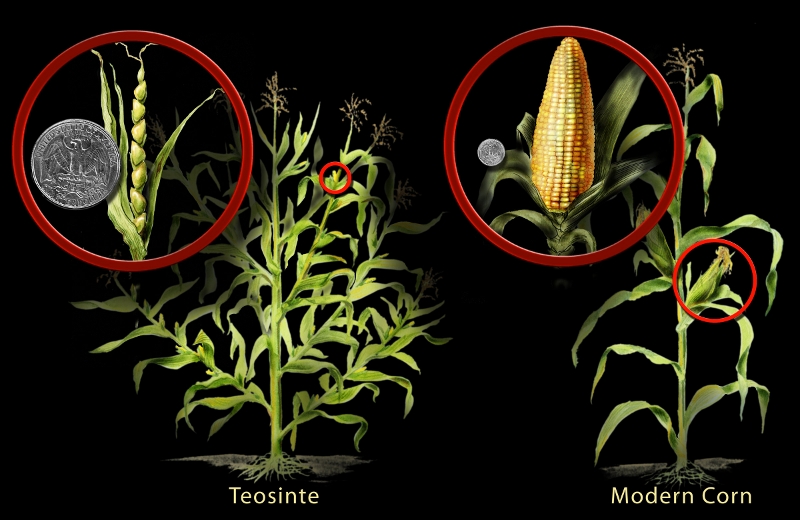
This drawing shows the similarities between modern corn and its ancestor, teosinte, after 10,000 years of cultivation. Illustration by Nicolle Rager Fuller, National Science Foundation
There are actually many varieties of maize-corn. Archaeologists are pretty sure that all of them resulted from the domestication and selective cultivation of the grass teosinte (pronounced tay-oh-SIN-tee), around 10,000 years ago by the people living in what is now Mexico. Over time, maize became a staple crop, yielding different varieties of nutritious and versatile grains throughout the American continent.
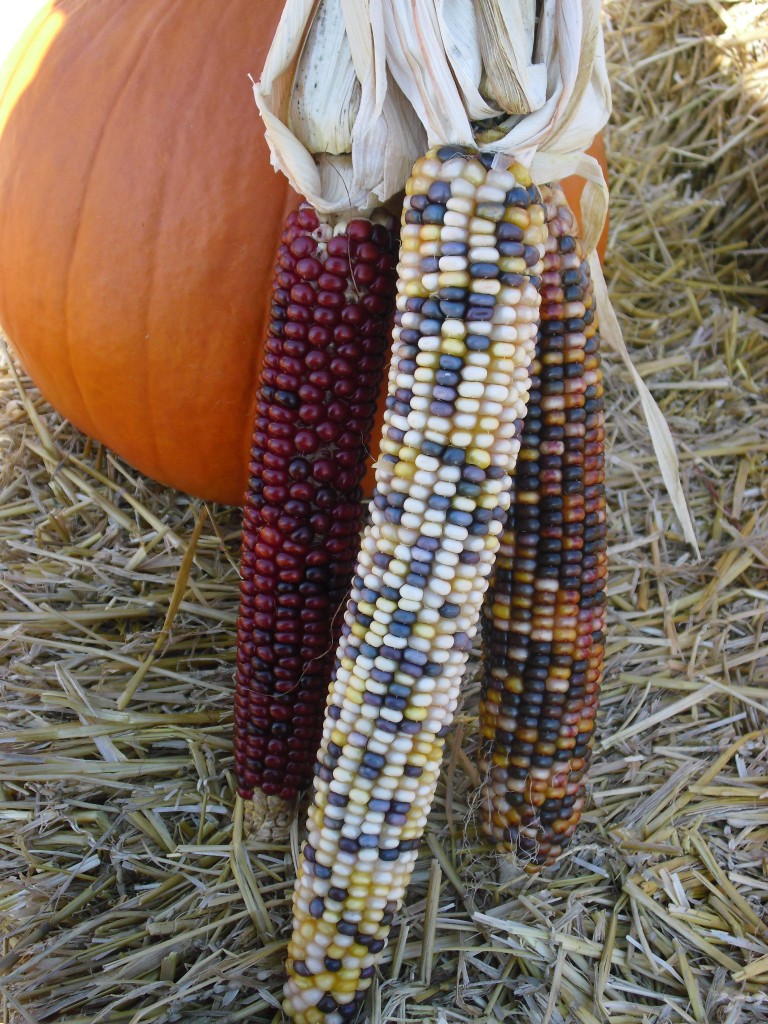
The farmers in my neighborhood sell Indian corn in bundles of three alongside gourds, pumpkins, and bundles of straw.
Indian corn is related to popcorn. These kinds of maize differ from other kinds in that they have a harder outer coating and a starchy interior with a bit of water inside the seed, or kernel. Popcorn pops when the kernel is heated quickly at a high temperature, causing the water inside the seed to suddenly turn into steam, inflating the starch. The sweet corn we love to eat and the dent corn used for tortilla chips and livestock feed will not produce a fluffy white snack when heated.
We can exploit these properties of Indian corn and turn the kernels into necklace beads to wear during the season.
How to make an Indian corn necklace
You will need the following:
- Indian corn (one average-size cob will make two necklaces)
- a sharp embroidery needle, long, with a large eye
- string; you can use ordinary sewing thread, but a little heavier is better
- a pot of water to cook and soften the corn
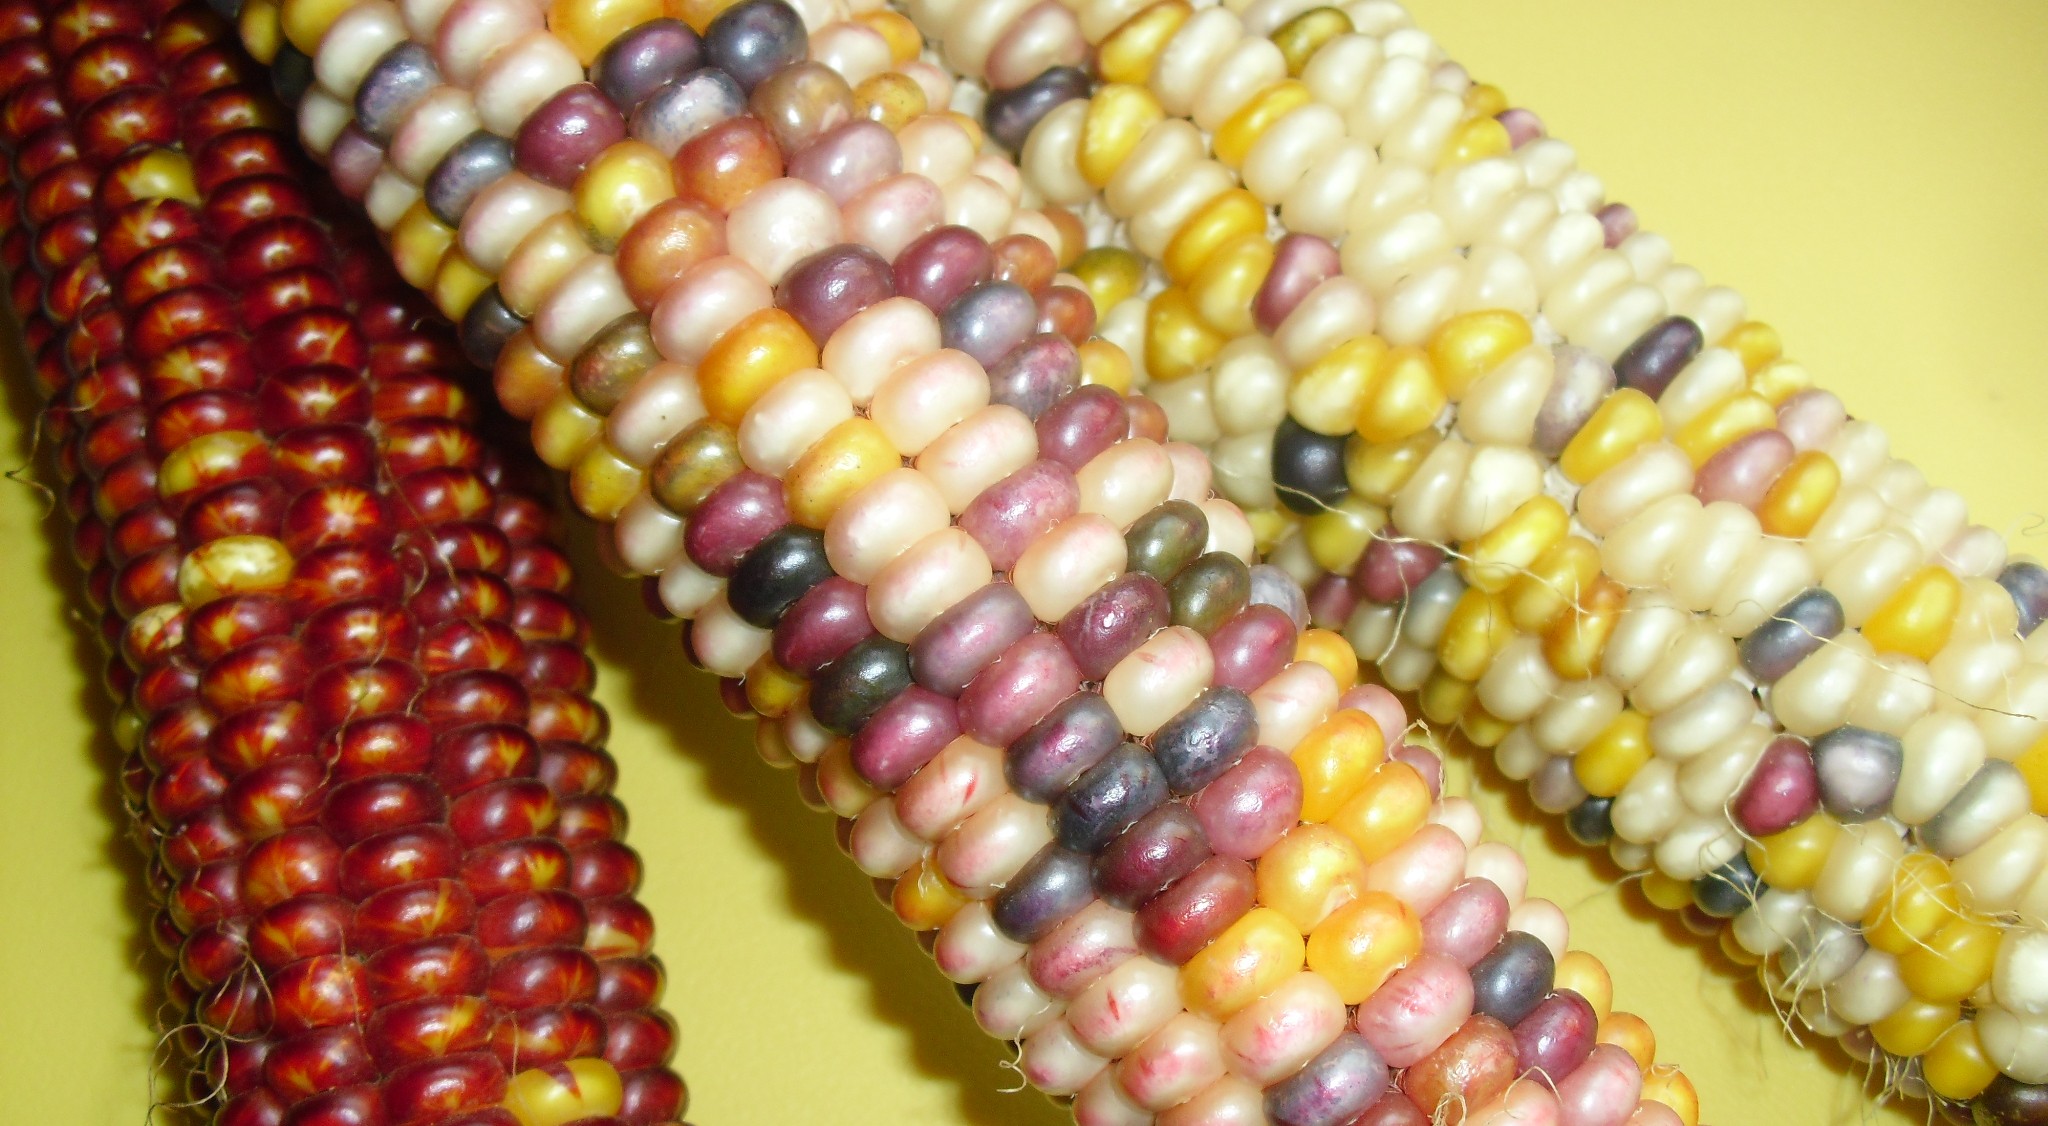
My daughter chose this bundle of Indian corn because she liked both the deep red of cob on the left and the pinkish seeds of the one in the middle—but not for the same necklace.
First, remove all the kernels from the cob. You can wedge a butter knife between the rows of kernels and twist to pop out the seeds. Once you get some of the cob stripped, you can rub the kernels loose with your thumb.
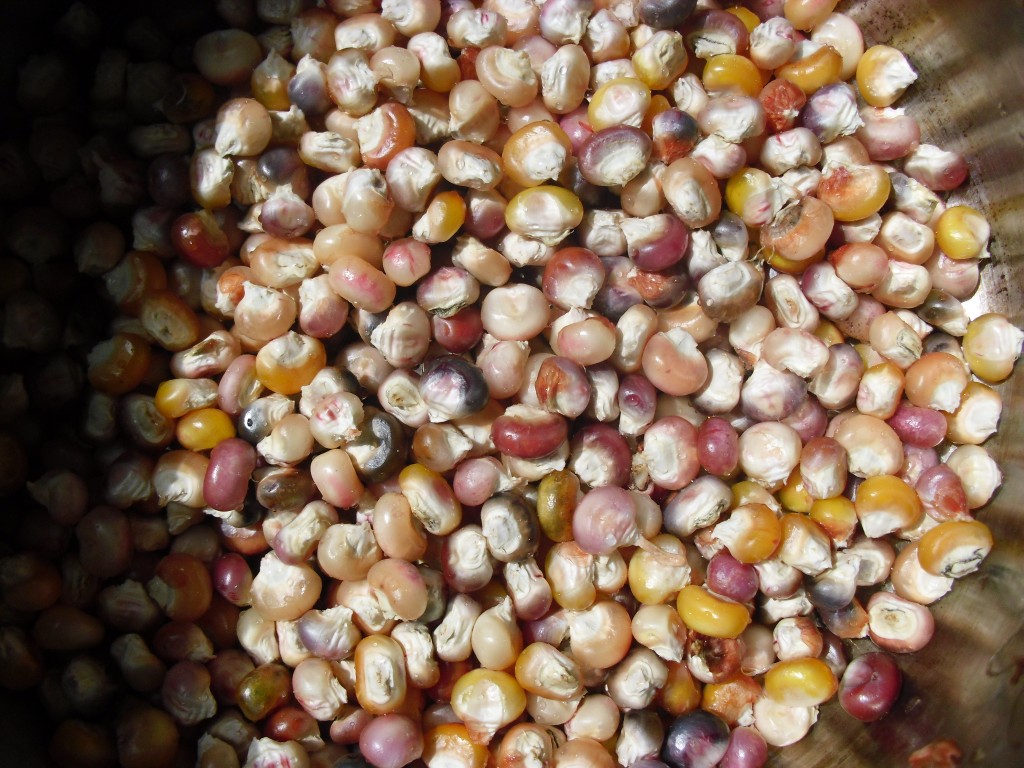
These seeds have been removed from the cob and are ready for boiling to soften them.
Place the corn kernels in a pot of water and boil for 30 minutes. (This isn’t hot enough for the corn to pop.) Test for doneness by removing three kernels. If you can push a needle through each of them easily, they are ready. Remove the pot from the heat and allow to cool. You can add cold water to cool them faster, but be sure to leave them soaking so they do not dry out, even when you are stringing them. (Pushing the needle through dry kernels can be a painful experience.)
While the corn is cooling, cut a string about three times as long as you would like your necklace to be. (You can work in shorter sections and tie them together, but it won’t look as nice.) Thread the needle and double the string; then knot the ends.
Now, select kernels in the colors you like, or pick them up randomly so the string resembles the color pattern of the corn cob. Try to pick softer pieces. Hold each kernel by the sides, and push the needle through the middle of the kernel so that the needle is not pointing toward your finger. Then slide it down the string. Leave a few inches of string below the first piece so you have some string to tie when you’re finished.
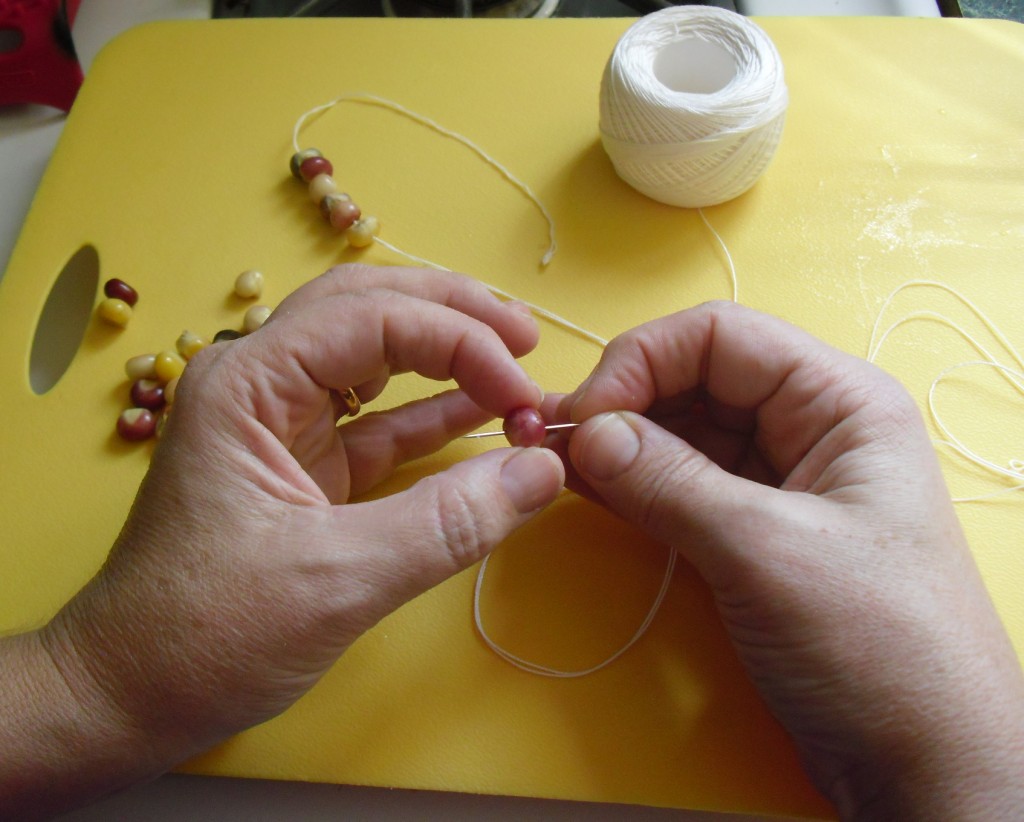
It is very important to hold the kernel by its sides as you poke the needle through the middle of the seed.
If the kernel is too hard and resists piercing, do not force it! Try to push the needle through at another angle, or discard that piece and select a softer one. This is important because you will prick yourself with the sharp needle if you are not careful. In fact, you’ll probably stab yourself at least once even if you are careful, so this is not a project for very young children.
Pack the moist seeds close together on the string. As they dry, they will shrink in size. You may want to slide them together a little tighter so the string doesn’t show, but you’ll also want to leave enough wiggle room so the necklace has flexibility. When your string of corn is long enough, allow the seeds to dry completely. Then tie the ends together and you will have an attractive necklace to wear to Thanksgiving dinner or other festive gatherings!
One final note: when I made a corn necklace in third grade as part of a unit on Native American culture, I was under the impression that indigenous people of long ago made and wore necklaces like this. No way. All corn was grown for food, and it was needed to sustain the population, so it would not have been turned into jewelry. This season, we can be thankful for the plentiful food we have to eat, and we can appreciate the beautiful colors of the corn as decoration during the feast.
